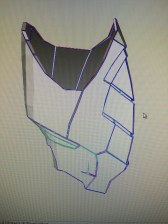
Hey everyone! Today, I wanted to write about making Cosplay armor. I decided to make some armor after seeing some others at my local con’s. It seemed pretty easy. That was not true. This is hard work. For someone that is doing this for the first time, it is not easy. Adding more pressure is that I wanted to wear it on Halloween. I know what you are saying, “Wasn’t Halloween back in October?” You would be right to assume that. I’m LAZY in my blog posts, plus college and work took up most of my time. So many man hours, so little time.
Bicep and Forearm

Bicep prototype

Elbow and Forearm prototype
These are the two prototypes that I have made. The bicep feels good on me, it is a little loose but seem like it would work. The forearm is where the problem lies. The wrist is fine, plus the elbow is feels good too. The forearm is too big for me. This is what happens when you get your plans off the internet. I have no idea how to size down the armor. Keep this in mind, that I have to create 2x all the pieces. Meaning create another arm. That is going to add some more time on this project. These two prototypes were created from pepacura models. Pepacura is origami in a larger scale. After all the testing is done, I am using 1/4 inch EVA foam for all the pieces.

EVA Foam pre-bicep

EVA foam pre-forearm
After fitting and sizing the paper model, it is time to draw and cut. You disassemble your paper model and sketch all of your pieces on the EVA foam. Tip: When cutting use a sharp disposable box cutter. This foam will dull the blade after 50 cuts.
So, after cutting all these pieces out, you have naturally glue them. Given EVA foam is high-density and has many holes to fill. You have to use hot glue. I used a low-temp hot glue. If I used a hi-temp glue them the foam could have melted at the point of contact. This took me two days to glue everything together. Finally, I can paint and assemble this Iron Man Mk 6 arm!
Painting

Painted (first coat) bicep, forearm, and shoulder.
Before you start to paint you have to prime the foam. It is just like priming a piece of wood before painting. If you missed this step them your foam would have a dull gray color mixed into the color you wanted. Making the primer is simple: 3 parts water and 1 part white glue. Paint this on the foam, let dry, and your foam is now sealed for painting. You also could use PlastiDip. This is basically liquid rubber. It come in a wide variety of colors, including clear and metallic. You can use it to seal you foam and put down a base coat your color, my case red.

Blood shoulder
Tip: Never mix 3M spray adhesive and PlastiDip. These two do not mix together, as seen in the picture above. I used the adhesive to keep the form of the shoulder. It did not help. As soon as I sprayed the PlastiDip, some chemical reaction took place and most of the rubber “globbed” off. Since I made this on the week of Halloween, it look like blood.

Chicago screw or post screw.
The elbow had to move. After some time searching the hardware store, I found this screw. This is called a Chicago screw or a post screw. The screw has a male and female end that screw into each other, with a smooth rounded edge. I also primed these pieces with the glue mixture and then painted all these pieces gold.
Assembled

Pre-painted full build w/o elbow (front).

Fully painted bicep, elbow, and forearm.

Full build assembled!
Finally, I was almost done. All I had to was attach the Velcro straps with some hot glue and staple them in place. Also, I had to get a baseball sleeve so you would not see my arm through any of the pieces, like the bend in the elbow. As you can see in my arm selfie, I went with a Iron Man 3 modular build.
I completed my first “cosplay”. Since I wore this during Halloween, I don’t know if this could be considered cosplay. This build cost me $68. By far the EVA foam cost the most, with an average of $24. I did cut out each arm but only completed the right side. I would only have to paint and assemble. Most of my help came from the prop maker Bill Doran(Punished Props) and his Foamsmith books. So, what do you think of my build? Love it or hate it? So, my question for you today have you cosplayed at a con? As what or if not who would you go as? If you have any questions or if there are any armor makers out there is there anything I am missing for this armor. Answer in the comments below.
Signing off for now.


hey this looks great I want to see the entire suit finished!
LikeLike
That is one of my goals this year. It might take some time but it will get done.
Thanks for the comment!
LikeLike